 Editor’s Note: As of January 2022, iland is now 11:11 Systems, a managed infrastructure solutions provider at the forefront of cloud, connectivity, and security. As a legacy iland.com blog post, this article likely contains information that is no longer relevant. For the most up-to-date product information and resources, or if you have further questions, please refer to the 11:11 Systems Success Center or contact us directly.
Previously in this blog series, we have installed Zerto, created our VPGs, and monitored the replication to ensure everything is meeting the required SLA. Unfortunately, a meteor has just plummeted to earth and destroyed our data center. All systems and access to our production are offline, and we need to get our business back online ASAP. Luckily, all we need is a phone or internet access to restore business functionality.
Initiating a Failover to the 11:11 Cloud
You will have two options for initiating a live failover to 11:11 in the case that your whole environment is offline. The first option is to call 11:11 Support. We have technicians available 24/7/365 who are able to conduct failovers from our Zerto infrastructure even if your site is offline. This option does include a few extra steps; our engineers will need to verify you are an authoritative contact before they can start the failover.
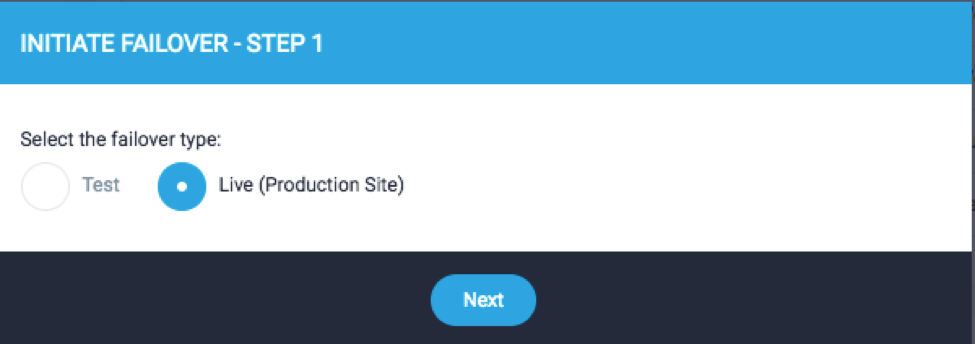
Your other option to failover your environment is to use the 11:11 Cloud Console. When you log in to the console, you can click the Continuity tab to view your VPGs. This Zerto functionality is pulled from the 11:11 for Zerto infrastructure and will be available even if your ZVM is offline. By clicking on the Failover Wizard, you can begin the process of selecting the VPGs to fail over and the restore point to fail over with.
Failover considerations
We have previously discussed Zerto live failovers and documented steps to perform this in these articles: Test vs Live Failovers in Zerto and Zerto Failover Instructions. However, there are a few additional considerations when performing a failover to ensure you restore functionality as quickly and easily as possible.
It is important to remember, for the most part, there is no “undo” functionality during a failover. You can delay the “Failover Commit” policy, which gives you an option to roll back the failover as if it never happened. This will cause you to lose any changes made on the failed over servers, but it can be helpful if you failover over your environment but the production side is brought back online quicker than expected. However, when you decide to perform a live failover, you should be expecting to run your environment in the 11:11 Cloud until your production data center is restored. At this point, you will reverse replication and eventually fail back to your production environment.
Failover and Boot Order
First, you want to make sure you have a boot or power-up order in mind before failing over all of your servers. Within a VPG, you can define a boot order, but that only works for the VMs in that VPG. Typically, you will have certain VPGs powered on first before failing over other servers. For instance, you may want to make sure your Domain Controllers or Active Directory servers are powered on first. If you log in to your servers with a domain account, you need to ensure the domain services are up and running first. This will prevent issues where your account is locked out of a server or getting a “No Logon Servers Available” error. You may also want to make sure database servers are powered on before an application server that uses the database. Creating and following a failover order can help get all systems online as quickly and easily as possible without the need for manual intervention. It is always recommended to test this failover/power-up order before disaster hits.
VPG Groupings During a Failover
You will also want to make sure you limit the number of servers you are failing over at one time. While it is tempting to select all VPGs and choose to fail everything over at one time, this will create a large number of tasks during failover as well as an import process that can delay the failover time. For instance, if you have 10 VPGs and each VPG has five VMs, you have a total of 50 VMs to failover. During the failover process, Zerto registers and imports your servers in the VMware backend. Those servers are then presented to the 11:11 Cloud Console where you are able to access and manage them. However, when you fail all 10 VPGs and 50 VMs at one time, there will be 50 separate tasks for importing the servers, attaching networks to the NICs, attaching disks, and powering on the servers. This will cause tasks to become queued up, and the time to failover will increase and become a bit chaotic. In this situation, it may be best to failover two or three critical VPGs first, ensuring those servers are powered on before the rest of the environment and decreasing the number of processes and tasks that could be queued. Once those VPGs are failed over, you can proceed with the next group of two or threeVMs, and repeat the process. Again, this ties in with having a boot or failover priority in mind during a failover.
External Considerations
There are some changes that you may need to make outside of Zerto and 11:11 to keep in mind as well. For instance, when you failover to 11:11, you will most likely have new public IPs that are used for your website, application, or terminal services. If your end-users or customers are accessing an application on www.adomainname.com, you will need to make sure that points to the 11:11 Systems public IP during the failover. There are a number of ways to set up access to the failover environment, IPSec VPN, SSL VPN, and/or Public access, and you will want to make sure that is working correctly. Again, running failover tests and ensuring end-user access is critical and is just another step or process to have documented for live failover scenarios.
Next Steps and Failback
You have been running your production environment at 11:11 for a few weeks and finally have your data center ready for production. If you had to build a new vCenter and ZVM server, you will need to pair back to 11:11. If your production environment was restored without needing to deploy a new vCenter or ZVM server the pair should automatically reconnect once connectivity to 11:11 is restored. In either case, 11:11 engineers will be in contact with you to ensure we have Zerto functionality back online and ready for reverse replication. We will work together to configure the VPGs for reverse replication. This process usually takes a significant amount of time, depending on how long you have run in the 11:11 environment. Essentially, Zerto will replicate all changes made while failed over to 11:11 back to your source production servers, and this will be very similar to when you synced up to 11:11 initially. During the reverse replication, your servers will still be online and functional in your 11:11 Cloud environment. However, the VMs in your production data center will be unregistered in VMware. This is because Zerto will essentially use those servers as a seed for the replication.
Once all VPGs are meeting SLA, we can schedule a time to fail back to production. This will work as a live failover again, and there will be an outage window as the servers fail back to production. Once that has been completed, the servers will be running in production as normal and replication to 11:11 will resume.
Conclusion
Hopefully, this blog series on Zerto Replication to the 11:11 Cloud has helped your understanding of the Zerto installation, configuration, and management process. The 11:11 deployment team will assist with getting replication to 11:11 set up as well as performing your first failover test. Once up and running, our 11:11 support team and engineers are always readily available if new questions, concerns, or issues come up. Zerto provides a user autonomous solution that allows you to be in full control of your business continuity strategy. Keep in mind that Zerto only handles replication and failover of VMs and the data on those VMs. You will need to prepare for, test, and document all processes and changes required during a disaster – and that is where the deep expertise that 11:11 Systems has in helping hundreds of customers implement disaster recovery plans comes in very handy.